Different yoga poses have a positive effect on various parts of your body. Yoga for beginners is necessary for people who are new to this practice because amateurs can be injured while practicing advanced poses. We have collected all the main poses that can strengthen your limbs and tighten the body.
Types of Yoga Poses

Yoga is an incredible practice that benefits your physical and mental health immensely. So, it is only natural that there is more than a single type of yoga poses to try out. Let's point out the main types of yoga poses for you to target the most acceptable route.
- Standing yoga pose – the standing poses are often referred to as easy yoga poses. These exercises are used to warm the body up before you dive deeper into the whirlpool of different asanas. However, you should keep in mind that various yoga styles may implement the standing poses differently. For instance, flow yoga would enlist those in longer sequences, while Hatha sessions treat each pose individually and allow you to rest in between the poses.
- Balancing yoga poses – since yoga is mostly about your balance, the appropriate poses are designed to help you grow some core strength before you proceed to more complicated poses. Yet, even the simplest of balancing poses may seem utterly challenging for first-timers, and it may take time to master those.
- Backbends – stretching and strengthening your spine is critical if you want to achieve the best results from your yoga sessions. The backbend poses allow your spine to become more flexible and extend further so that you can bend deeper.
- Seated poses –seated exercises are usually focused on your hips and hamstrings, so they stretch nicely. In the majority of classes, these poses are triggered by the end of the session.
- Resting yoga poses – sometimes they are referred to as supine poses. They are responsible for proper relaxation from the stress your body may undergo during the course of the class, especially at the beginning of the journey.
Standing Pose Types
Downward Facing Dog (Adho Mukha Svanasana)
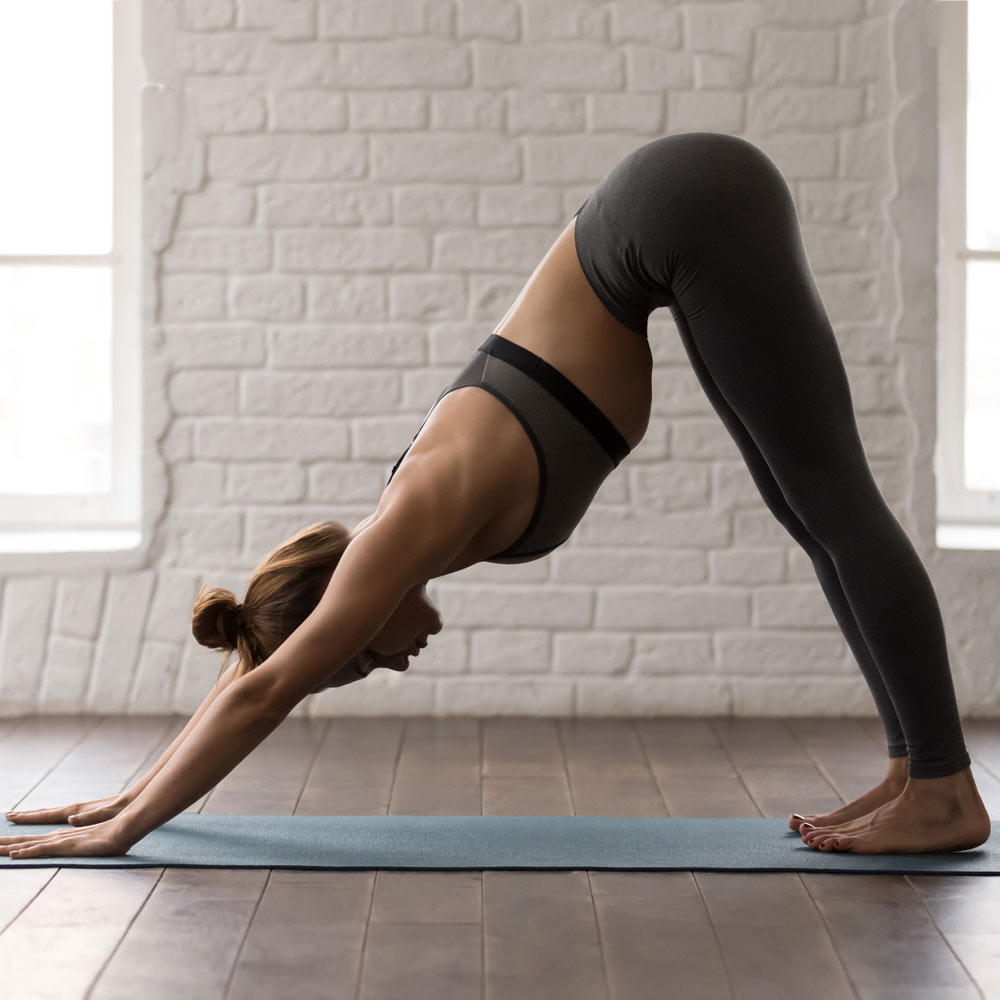
As we start with yoga poses for beginners, you may falsely assume that they are effortless and can be mastered from the first try. The reality is quite different, though. You may have already heard about the Downward dog pose and its positive effect on your digestion and circulation. On top of that, the pose can help you unwind, relax and get rid of anxiety. While Adho Mukha Svanasana is basic in its core, there are some mistakes to avoid.
- First things first, try not to lean to far ahead so that you don't end up standing in plan rather in the Downward dog pose.
- Center your weight in your legs and reach the hips high.
- Stretch your heels toward the floor, and make sure they are not touching it, though.
- Bend your knees a tad if you feel that your hamstrings are too tight.
- Keep your feet parallel to one another.
Mountain Pose (Tadasana)
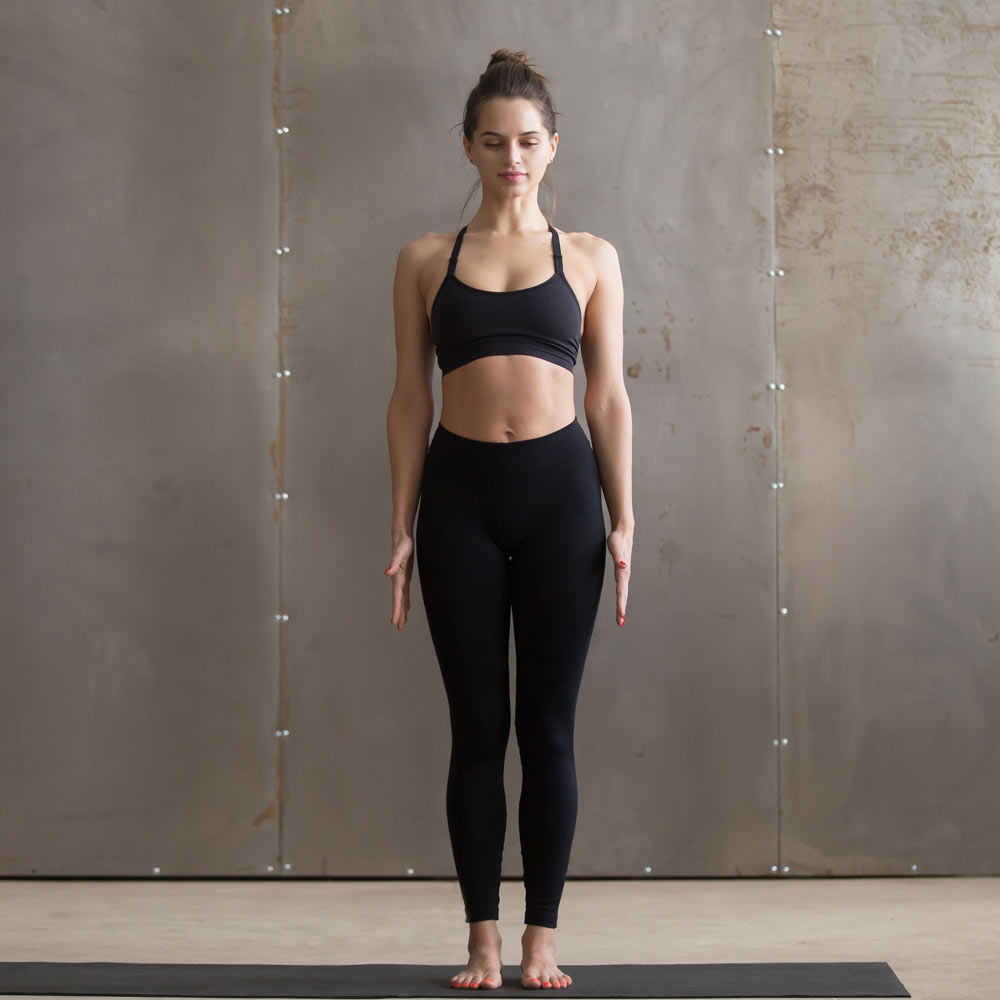
There are quite a few basic yoga poses, and the Mountain pose is on the list. It may not be as widely recognized as the Downward Dog one, but it is tremendously helpful when it comes to the proper alignment of your body parts. When doing the Mountain pose, you should try to arrange your body in a straight line. Surely, our bodies are different, but you must root down with your feet and lengthen the spine.
When in yoga class, the teacher will remind you to slide the shoulders back and keep the weight on the heels. However, as you keep on practicing, you will get used to it on your own, even when exercising at home.

Warrior I (Virabhadrasana I)
There are a few warrior poses in yoga, in case you don't know. The Virabhadrasana I pose aims to build up your strength, balance, and the ability to stretch, not to mention that it is utterly beneficial when working on your lean legs. The Warrior I pose isn't utterly advanced and complex, but you must keep in mind that your hips should always face forward. You can imagine your hips as a set of headlights lighting the path in front of you. A wider stance will help you succeed with the pose in no time.
Warrior II (Virabhadrasana II)
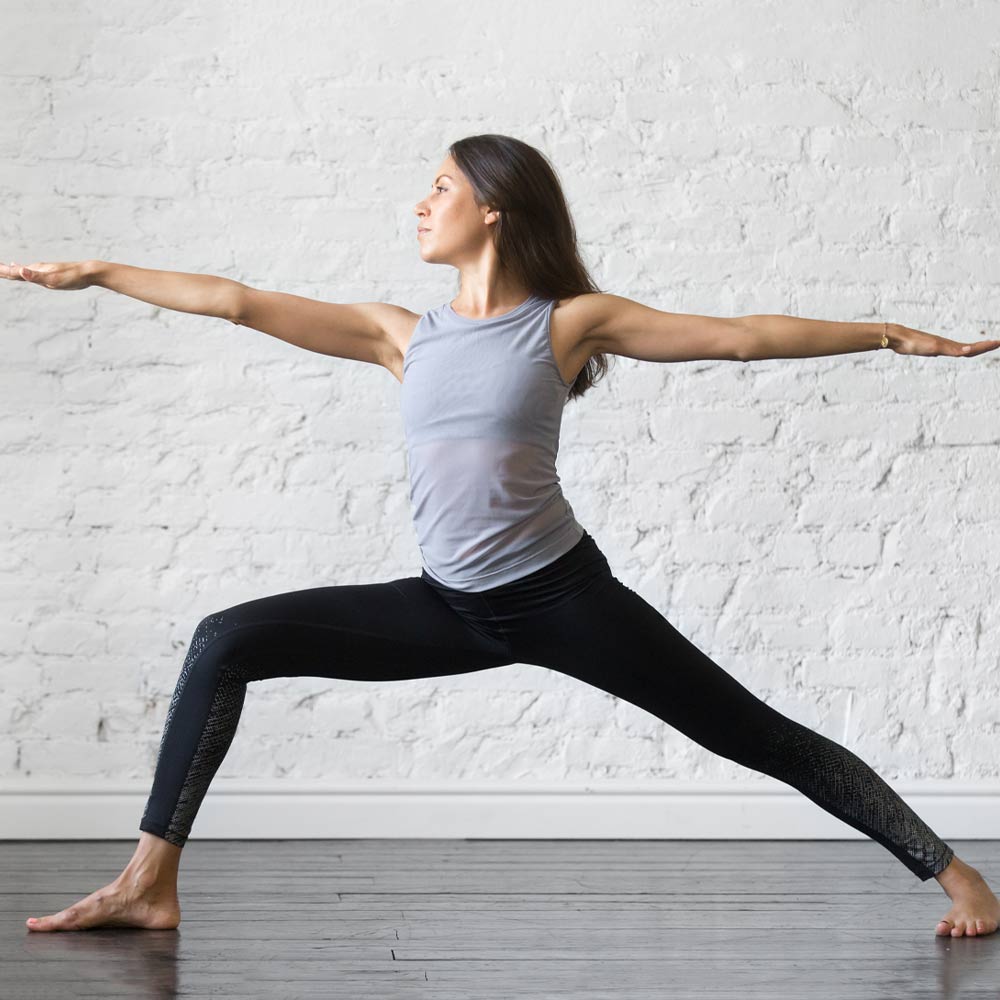
The second warrior pose is helpful when working on your chest and lungs. However, it will also boost energy in your limbs if done correctly. Some sources mention that Virabhadrasana II is beneficial when it comes to dealing with infertility or osteoporosis.
- When trying to manage the pose, you have to face your hips to the side of your mat, unlike with the Warrior I pose.
- Open your hips and shoulders to the side when transitioning from the first pose to the second.
- Pay attention to your back foot. Make sure that the toes are angled at 45 degrees.
- Face the front toes forward.
Extended Side Angle (Utthita Parvakonasana)
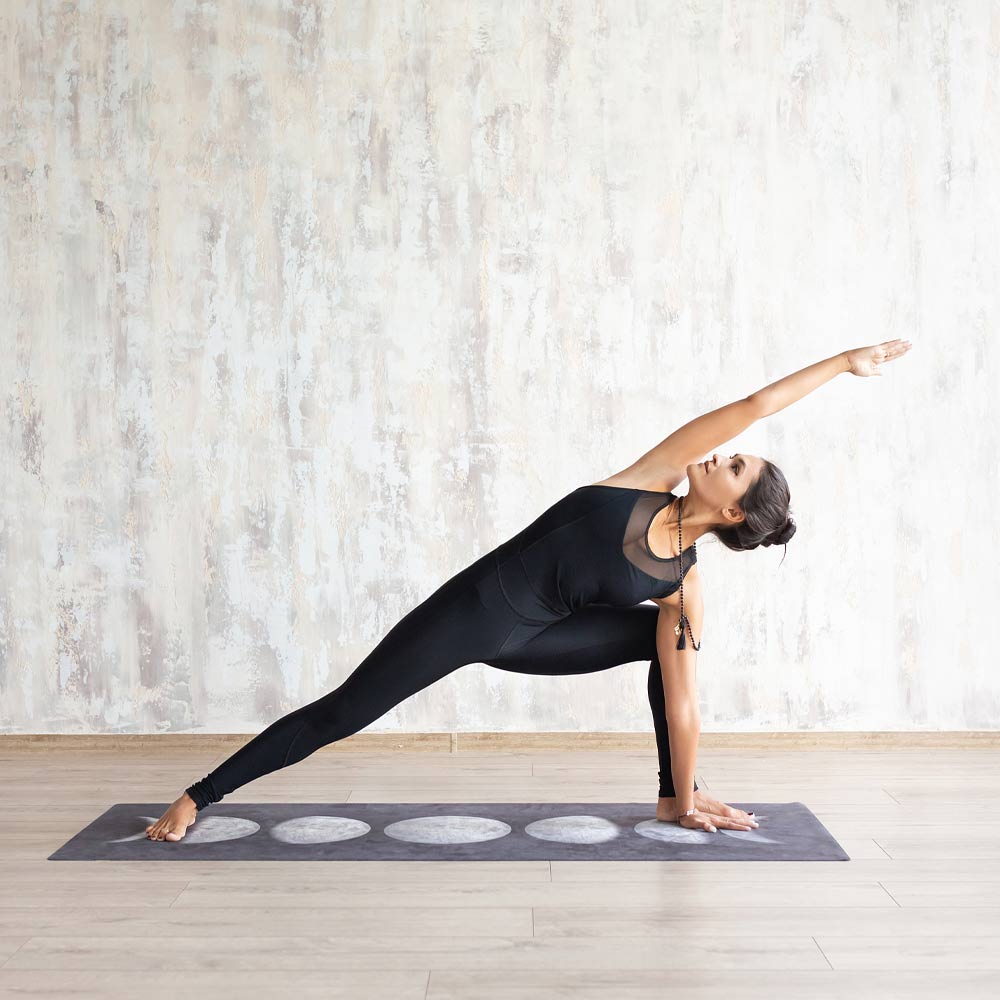
What makes some yoga poses difficult is the precision. While the Utthita Parvakonasana pose is known to be good for your abdominal organs, it is challenging to align your body correctly when trying it for the first time. Yet, once you master the Extended Side Angle Pose, you will reap all the strengthening and stretching benefits it presents.
- Keep in mind that your main goal is not to place your hand on the floor near your foot but to bring the forearm to your thigh.
- You can rest the forearm on your thigh.
- Keep your shoulders open, and use a block if necessary.
- Try not to reach the floor at the expense of your torso.
- Don't turn your chest toward the floor too much. Aim it at the ceiling instead.

Triangle Pose (Utthita Trikonasana)
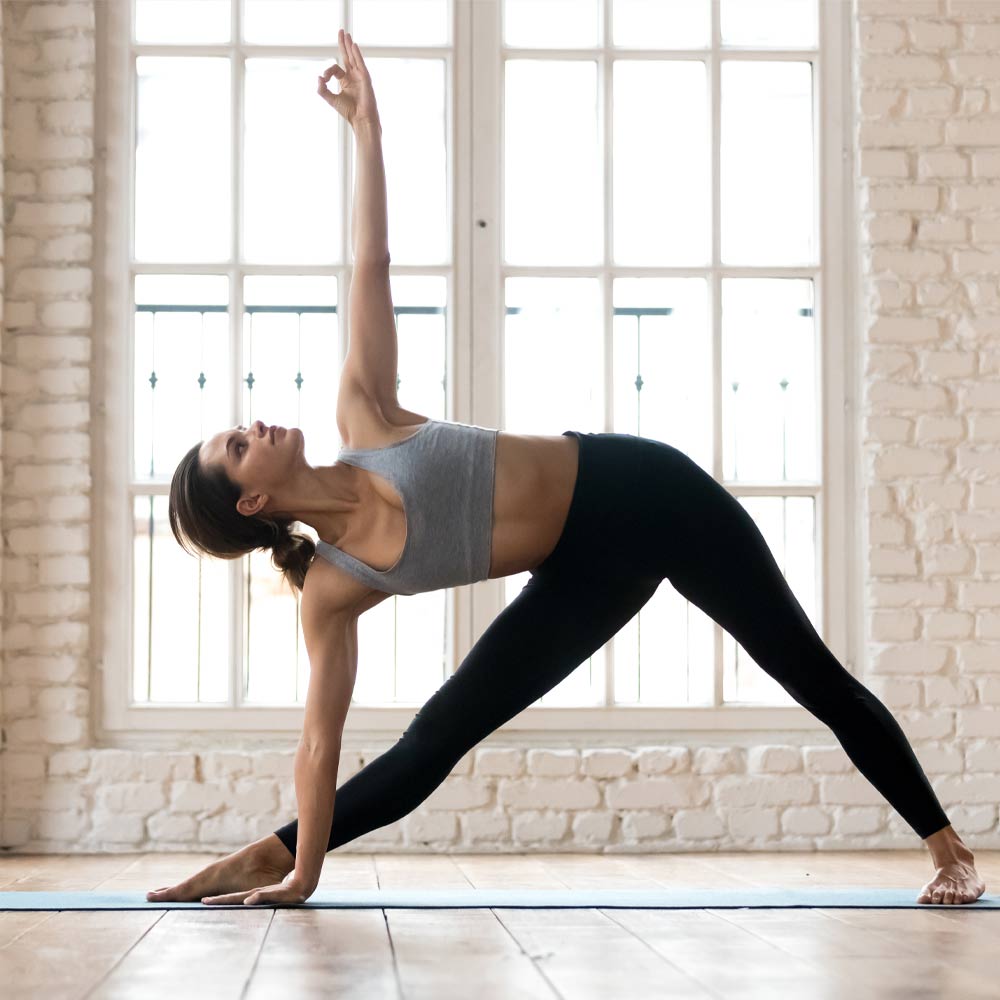
Utthita Trikonasana isn't precisely one of the simplest beginner yoga poses, but you shouldn't shy away from trying it. The Triangle pose will strengthen your core, legs, spine, and hips. Besides, should you suffer from back pain – the pose will help you cure it too.
- In case you fail to position your body in the Utthita Trikonasana pose straight away, you may want to introduce the block into the routine.
- If there is no block at hand, you can rest your hand on your leg, but keep away from your knee.
- It is allowed to bend both of your knees a little if the position is too challenging.
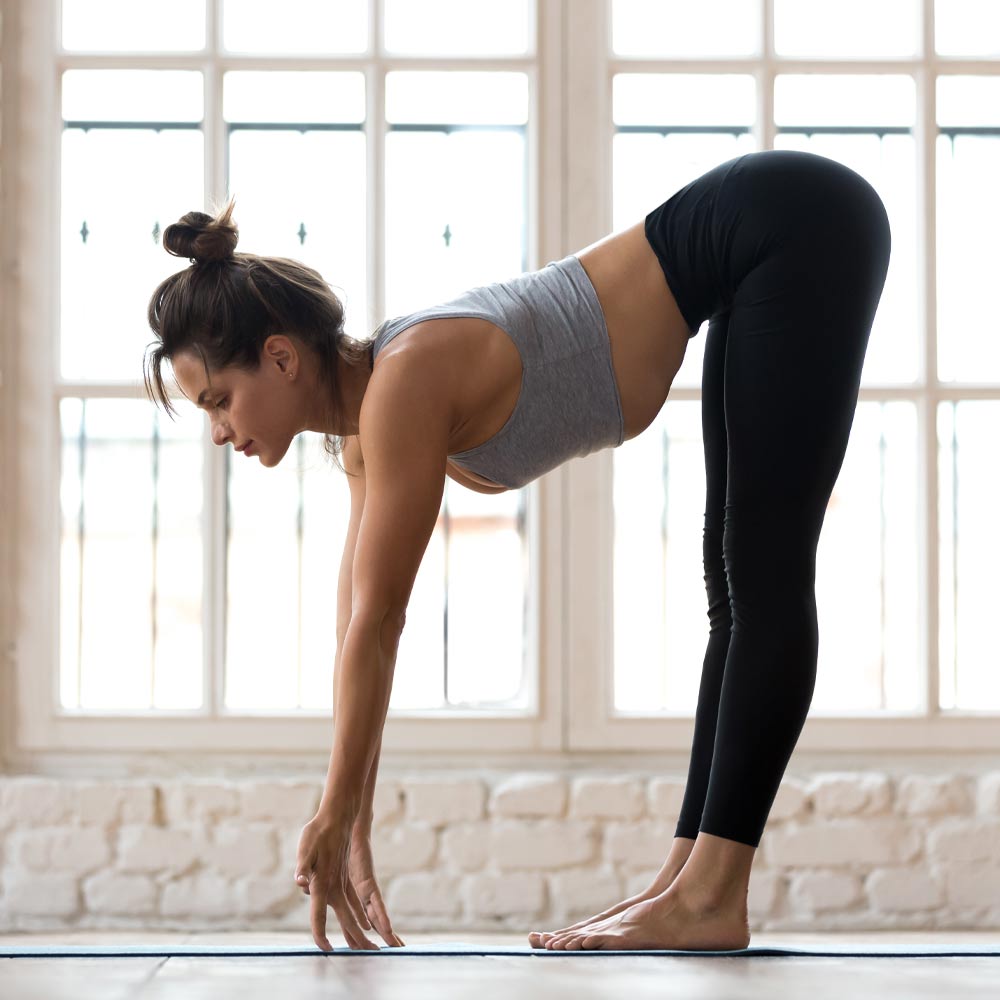
Standing Forward Bend (Uttanasana)
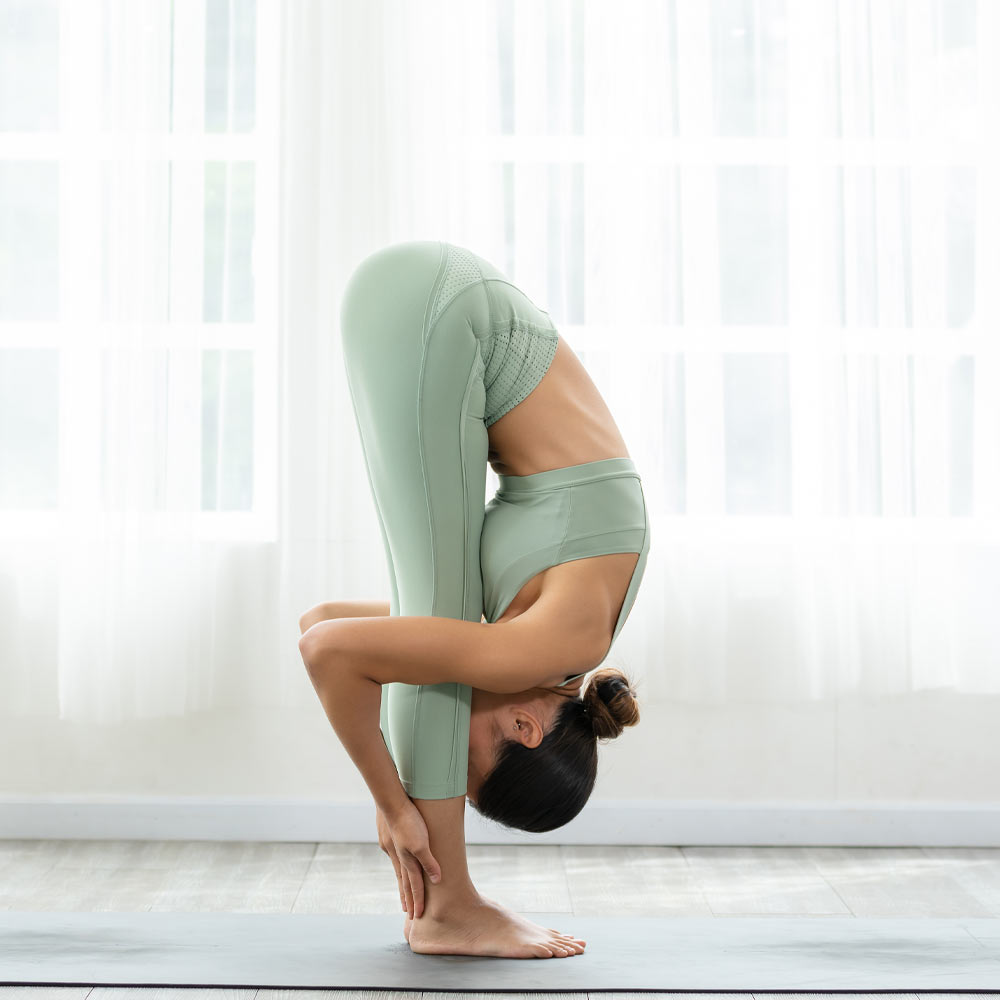
Uttanasana is one of the most widely used standing yoga poses. It is incredibly beneficial to women's health since it helps to deal with menopause and menstrual issues if any. Moreover, the pose will help you regain your inner peace and get rid of insomnia and casual headaches.
The Forward Fold is based on the Mountain pose.
- As you assume the Mountain pose, exhale and try to press your head to your knees.
- Pull your head down and try to press your belly to your knees.
- Keep the pose for around 4-8 breaths.
- In case your hamstrings are too tight, you can bend the knees a little.
- You can try holding your elbows and swinging from side to side to release the remaining tension.
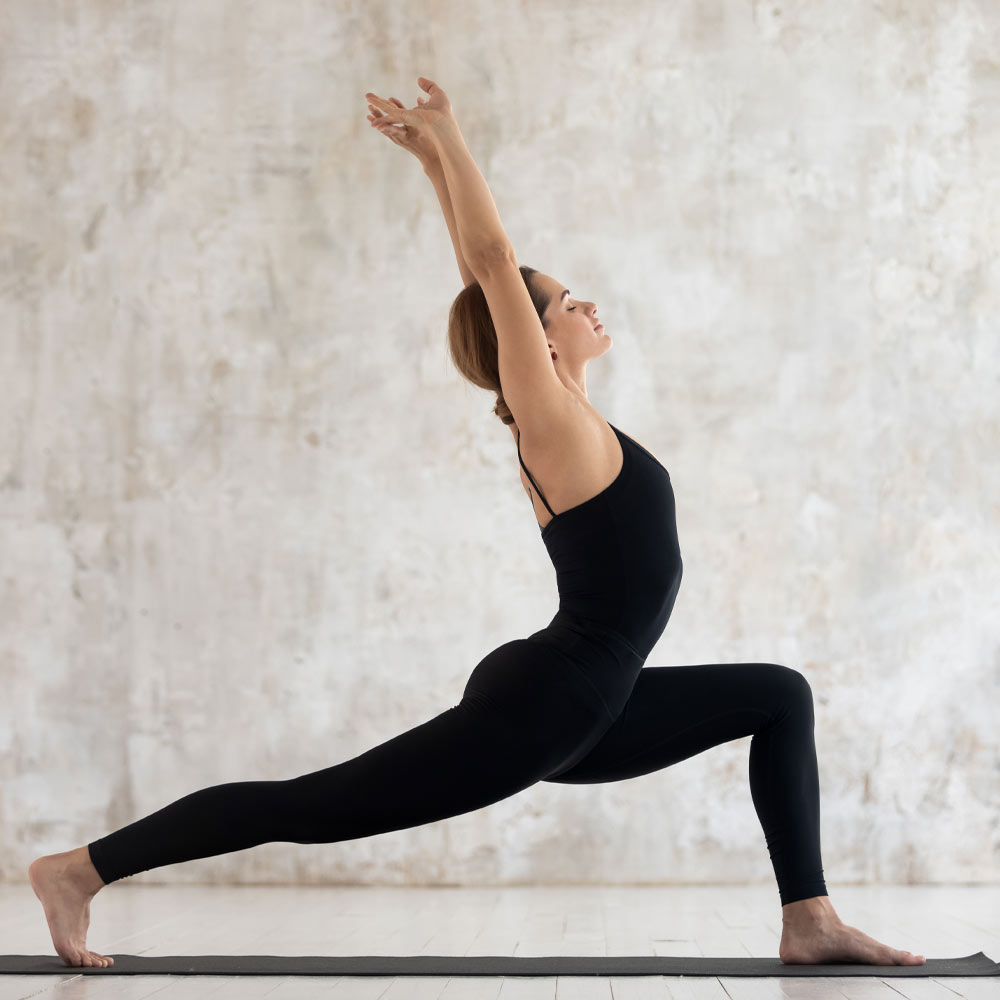
Reverse Warrior (Viparita Virabhadrasana)
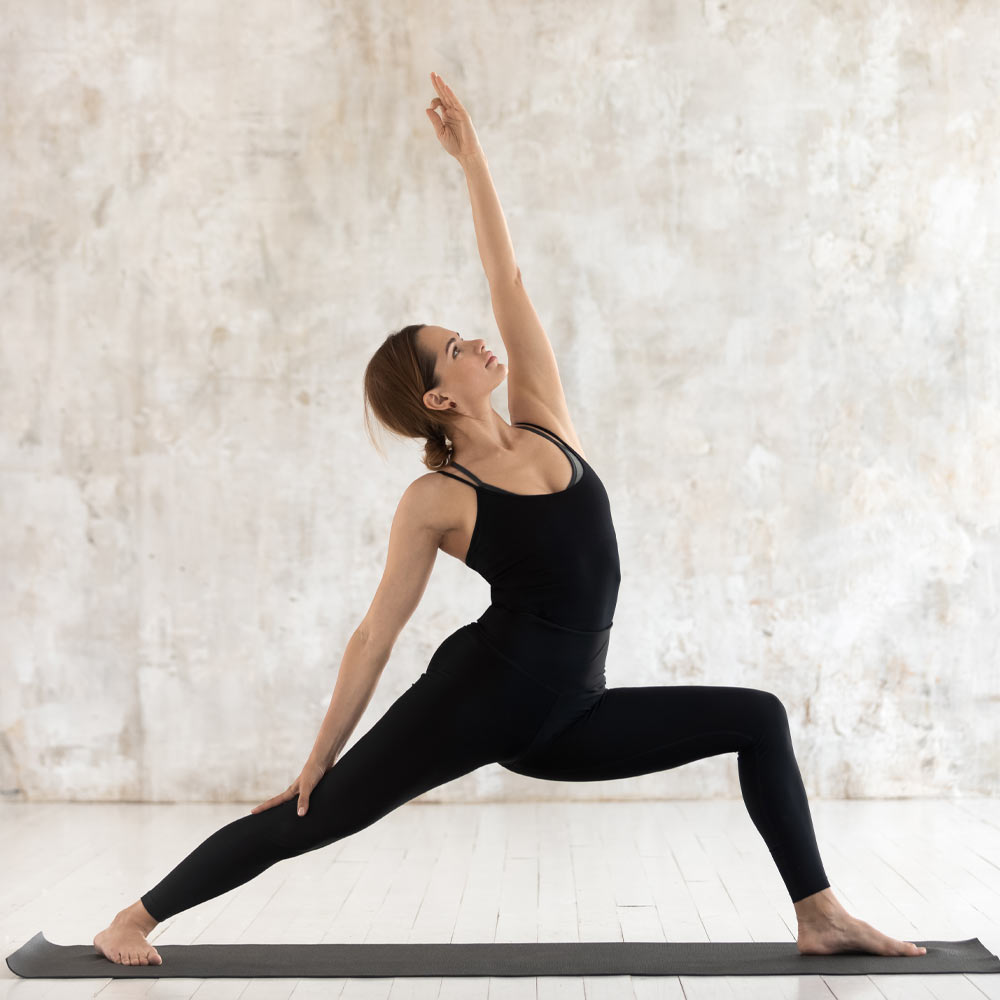
One more pose, quite similar to the Warrior I pose is Viparita Virabhadrasana. The Reverse Warrior features a heart-opening side bend or backband. Despite the visible simplicity of the pose, you have to rely on your front foot so that you are steady and balanced.
- Root in the sole of the foot and engage your glutes along with the hamstrings.
- Reach one hand overhead and follow it with your gaze.
- Sink down a little and make sure that the front knee tops your ankle.
Garland Pose (Malasana)
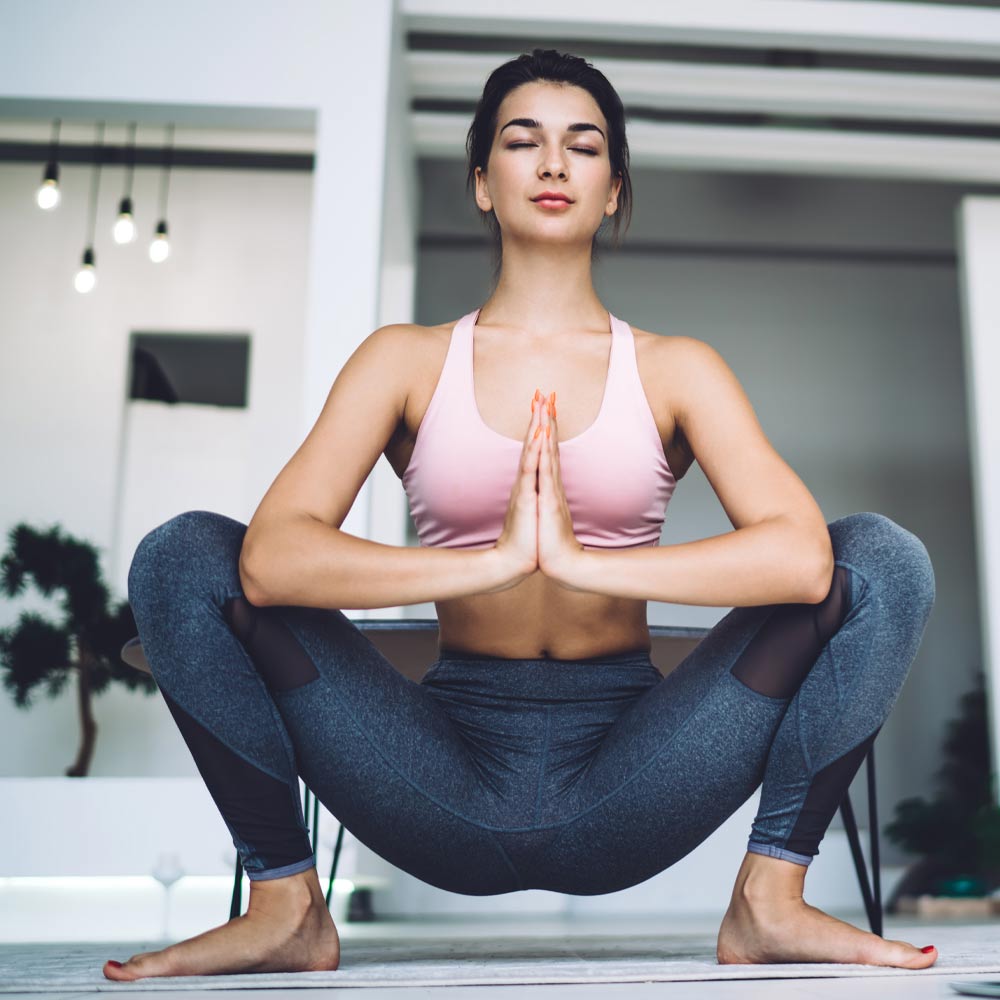
Malasana is known to improve muscle strength. Along with that, the pose tones your belly, but you should stay away from practicing it if you suffer from any knee injuries.
- Squat deeply or use a block for sitting on. You can also place a rolled towel under your heels.
- Press your heels down.
- Lean a little forward to secure your torso in between your thighs.
- Put your arms in a praying position, so the elbows touch the knees.
- Keep the pose for around 30 seconds.
Half Forward Bend (Ardha Uttanasana)
At times, the Ardha Uttanasana pose can be used as part of a more complex set of exercises, but you may want to point it out and do it separately. The Half Forward Bend is known to help you develop a better awareness of your body and the back part in particular.
- Bend down forward with a flat back.
- You may want to start off by keeping your hands on your legs as high or low as comfortable before you reach the ground.
- A slight knee bend is allowed.

Pyramid Pose (Parsvottanasana)
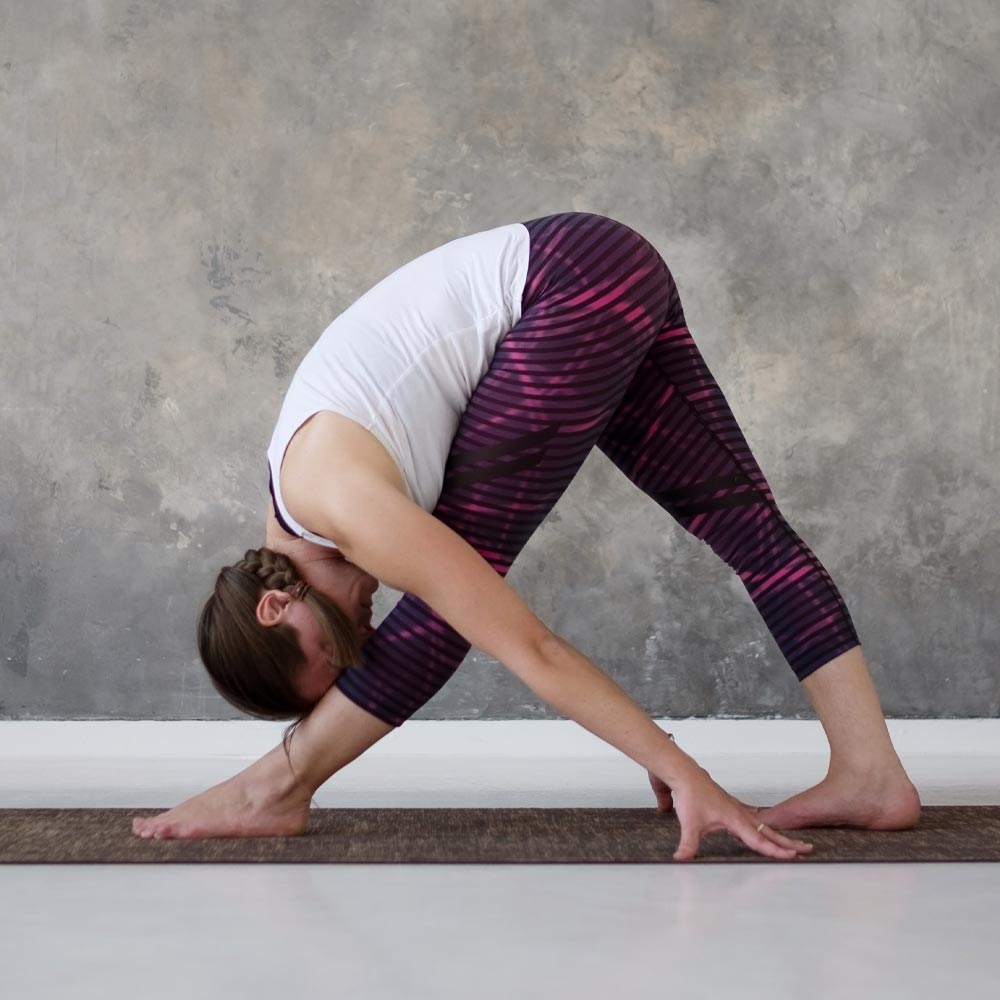
Parsvottanasana is perfect for general muscle toning, but it is highly beneficial for the hamstrings. The pose isn't complex at its core, but your body may require a fair share of assistance so that you master the art of the Pyramid pose well.
- Start with a block on either side of your front leg so that the surface you lean on gets slightly higher.
- Bend forward and try to touch your leg with your forehead.
- Place the hands closer to the back leg without leaning over your hands.
- Keep the pose for around 30 seconds.
Raised Hands Pose (Urdhva Hastasana)
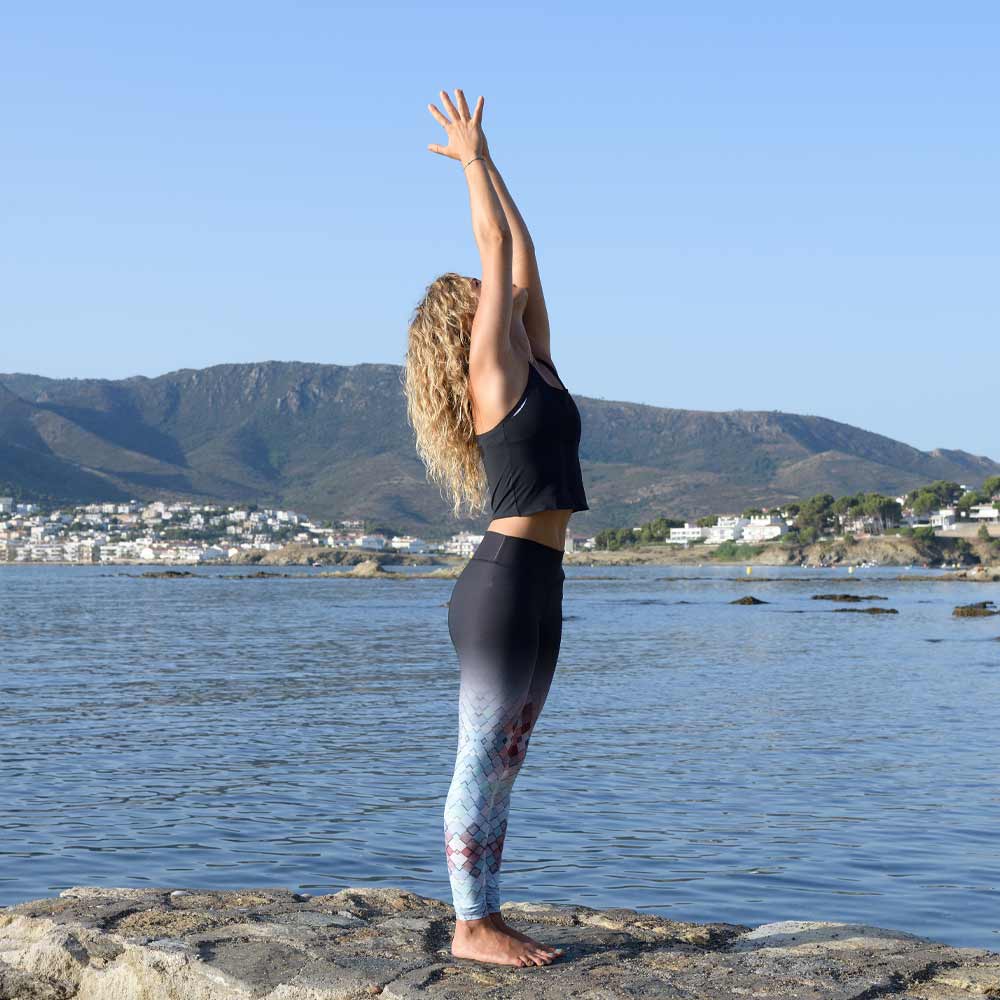
Urdhva Hastasana is the standing pose aimed at muscle alignment.
- Stand tall and raise your arms overhead, so the palms face one another.
- Push the shoulders back from your ears so that you broaden your collarbones.
- Root into your feet.
- Push the navel back.
- Keep the pose for a few breaths.
Low Lunge (Ardha Alana)

Ardha Alana is claimed to relieve sciatica and energize your body throughout. However, it is trickier than it seems. Perfect body alignment is critical during practice.
- Make a right angle with your knee placed over the angle.
- Parallel your thigh with the floor.
- Get deep enough so that your back leg does not sag.
- You can place your hands on blocks to simplify the pose. Lowering the back leg is an option too. It is essential that you feel as comfortable as possible during the practice.

Balancing Poses
Tree Pose (Vrksasana)
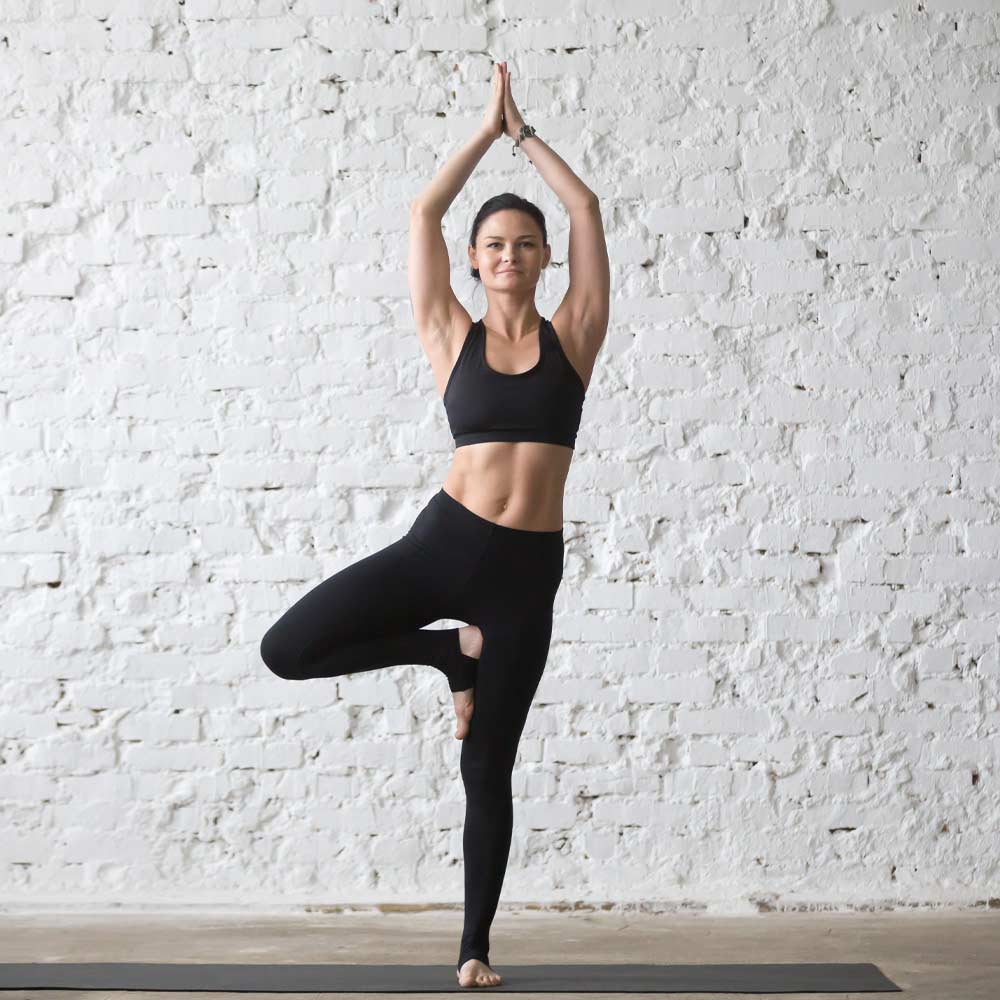
Yoga balance poses are incredibly useful regarding concentration and overall body balance. Vrksasana is a perfect introduction to the pool of balancing poses.
- Stand tall and close your eyes.
- Find the perfect center, slowly raise one leg, and place it on your ankle.
- Point the toes down.
- Raise your hands overhead.
- Take a few deep breaths and change the leg.
Downward Facing Dog Split
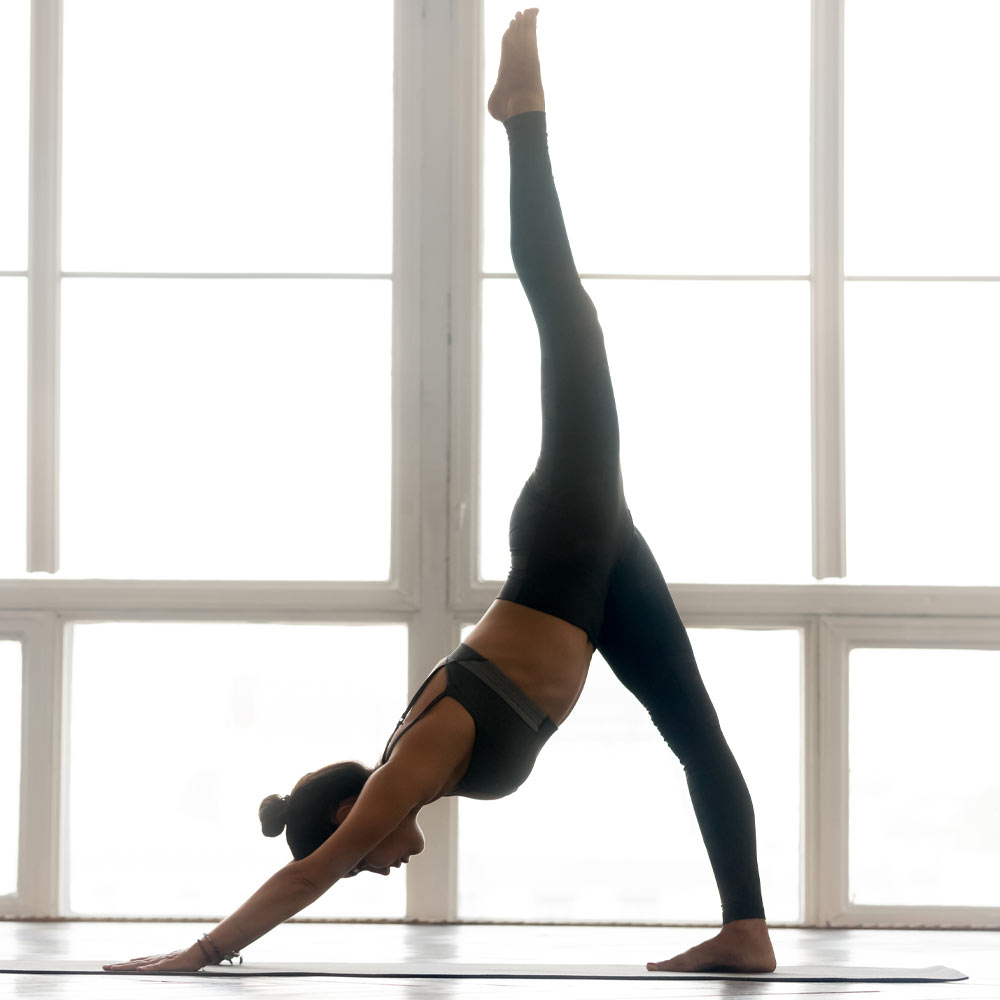
As we move on, we approach the more advanced yoga poses, and Downward Facing Dog Split is undoubtedly on the list. Postures like that are incredibly helpful when you aim at building your core strength.
- Lean down with your hands on the floor and raise one leg in the air.
- It does not matter how high you can raise the leg. The focus should be on your body's weight as it evenly distributes in your hands.
- Hold the position for a few breaths and switch sides.
Plank Pose
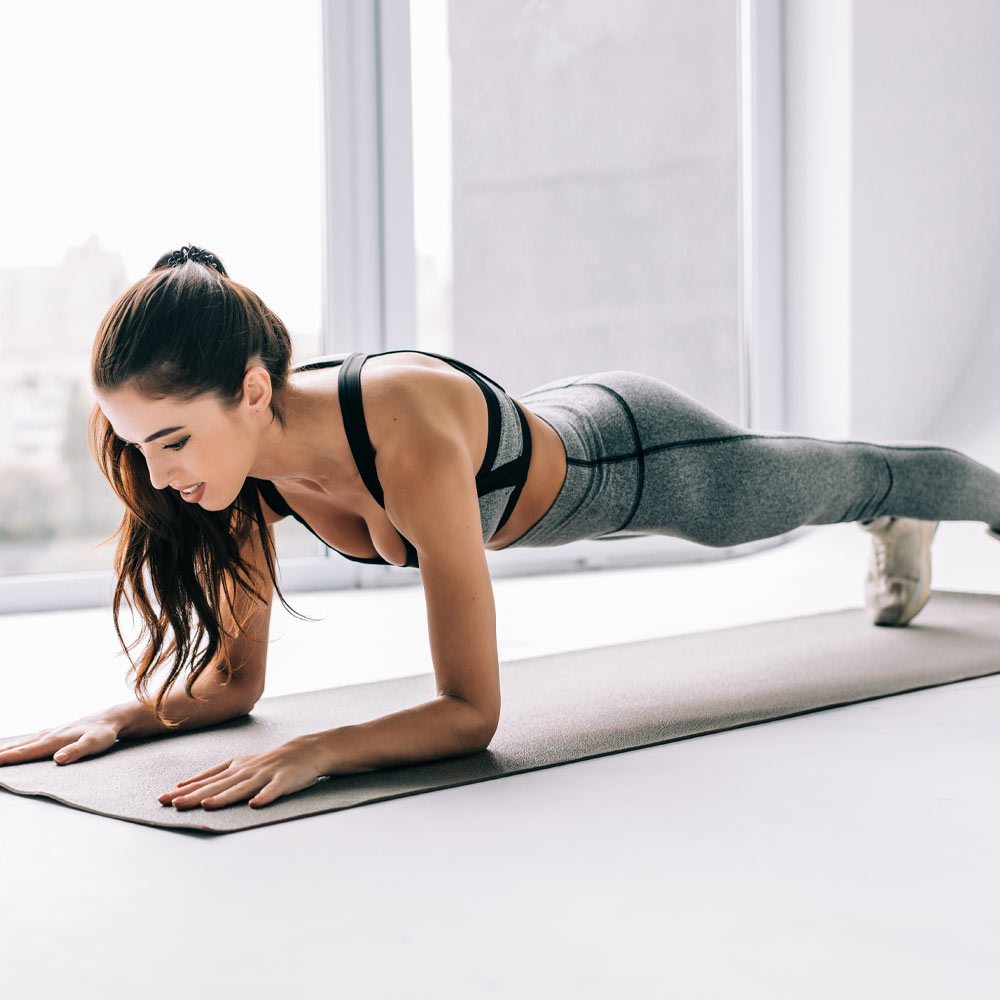
There are many one-person yoga poses, some of which are more popular than most. The chances that you have heard about the Plank Pose before are incredibly high. However, you may have never assumed that the exercise belongs to the pool of yoga poses. While the plank is mainly about core strength, you will improve the overall muscle state as you keep practicing it. As you practice the plank pose, it is not about how long you can keep it. It is about the perfect balance and neutrality of your spine.
Dancer Pose (Natarajasana)
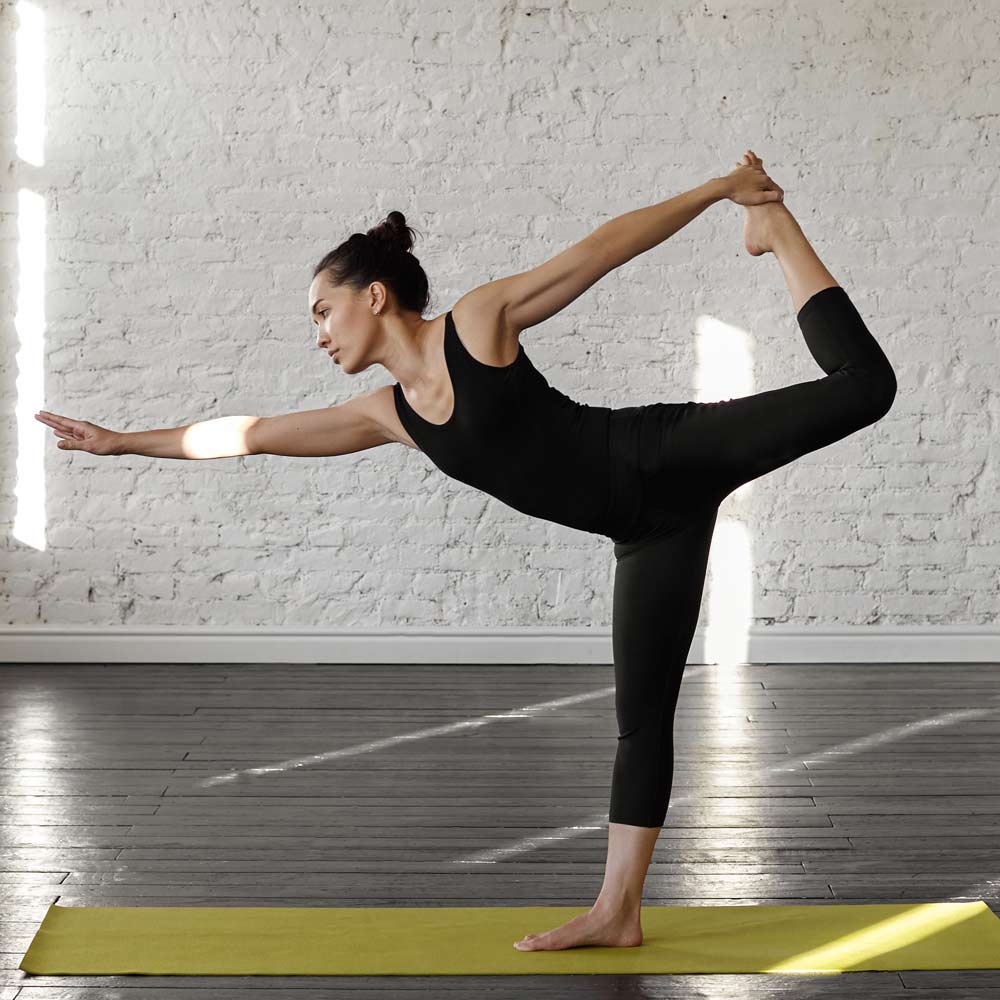
Natarajasana is yet another pose aimed at improving the flexibility of your body. Moreover, the posture will also improve your focus and mood, not to mention its positive effect on a weight loss journey. Try not to start with the exercise if you are new to yoga. The posture relies on perfect balance, proper back bending, and open shoulders. You may want to practice these before you transition into the pose.
Backbend
Cat-Cow Stretch (Chakravakasana)
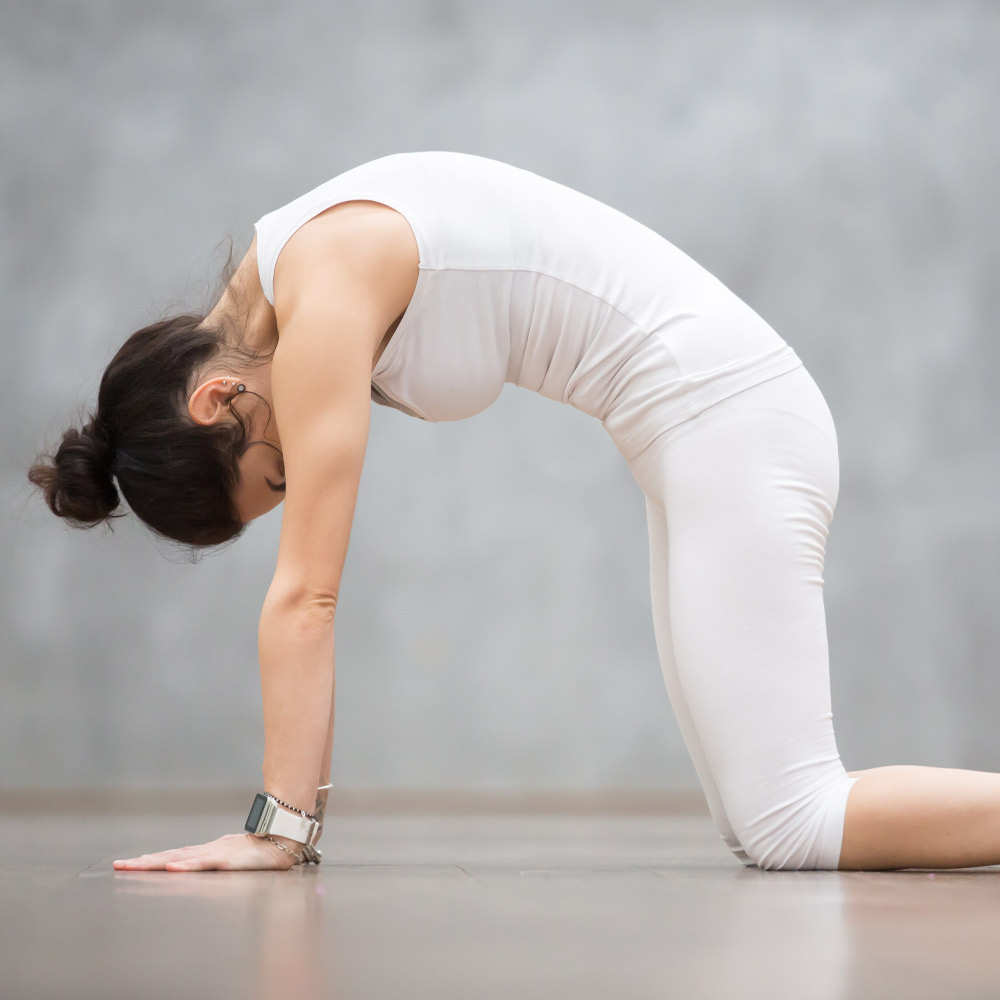
Chakravakasanisa is one of the best back stretching poses if you are dealing with back pain and want to improve your overall back flexibility in general. Its name is derived from the sequence of back positions you assume. When you round your back, you look like a cat when it is scared or agitated. The cow position is about drawing your back in. When you assume the poses one after another, you will get rid of all the tension and stress encoded in your spine. It is recommended to do the stretch even if you don't practice yoga as a whole. The exercise can be your closing pose after a gym, home workout, or a sole stretch after a hard day.
Bridge Pose (Setu Bandha Sarvangasana)
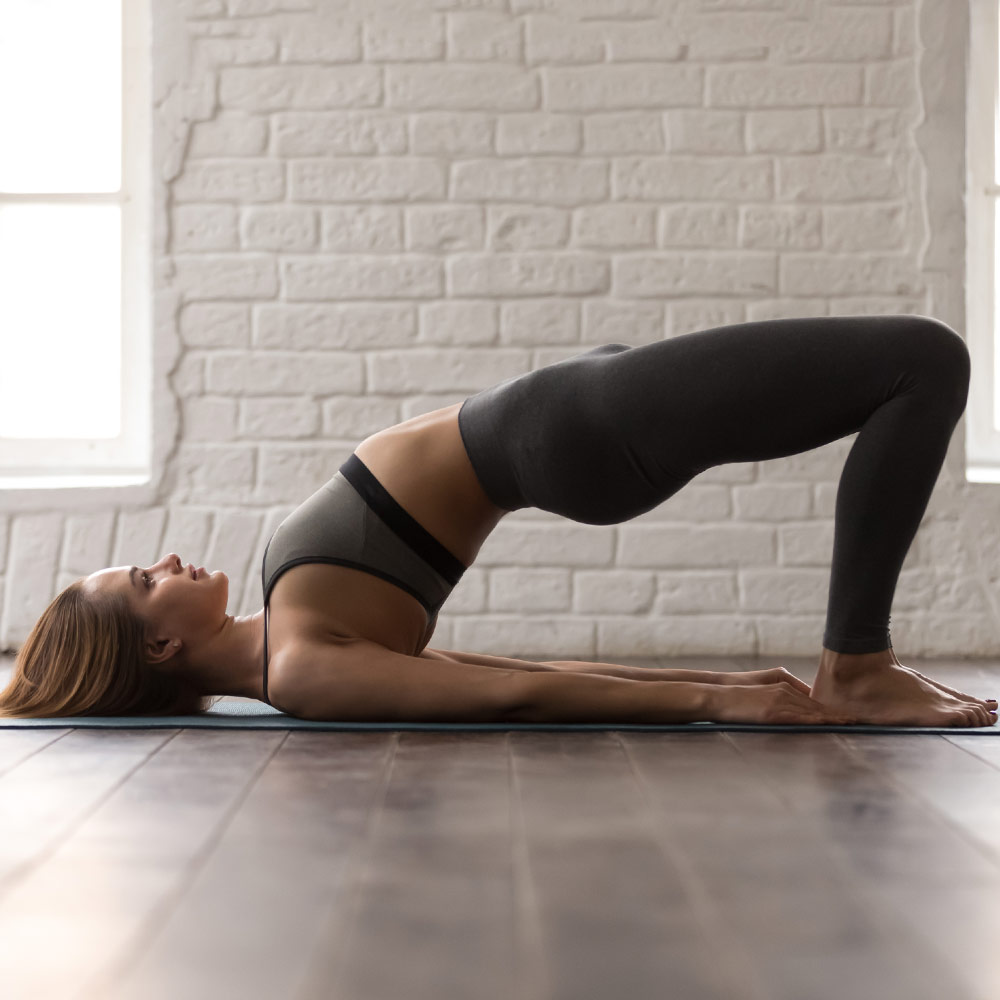
Setu Bandha Sarvangasana is precisely the posture that those who lead a sedentary way of living must incorporate into their routine. The pose will improve your spine's mobility and destress your body. All it takes is a few breaths to stand in the position to reap its benefits. In case you feel that the pose is too complex for your fitness level, you can always use a block to provide the necessary support. Keep in mind that you must root into your feet so that the leg muscles take most of the load.
Cobra Pose (Bhujangasana)
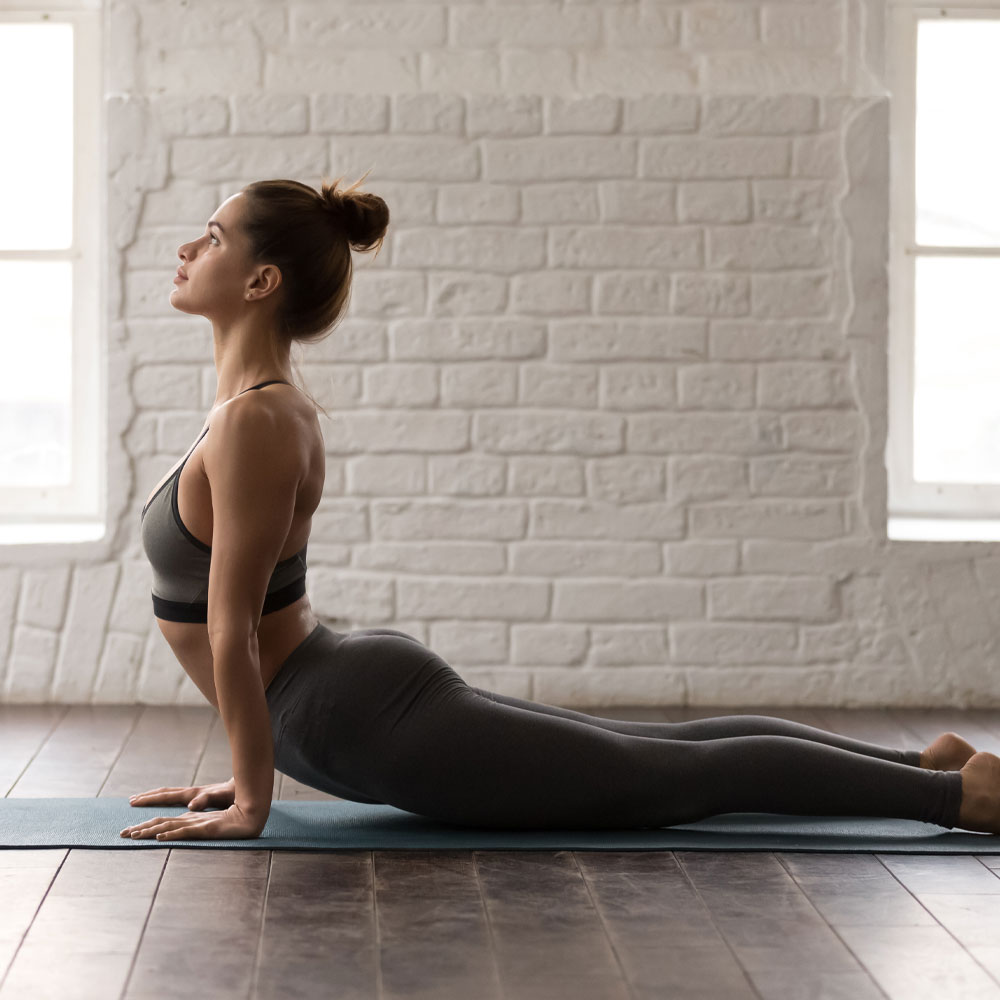
Bhujangasana is seemingly a simple pose, but it takes more than you expect to master it. In many yoga classes, the Cobra pose is used more than once throughout the session due to its immense positive effect on your body. The posture provides a deeper backbend so that you build more strength.
Whether high Cobra or low Cobra, you must root into your feet, lengthen up through the head, and broaden through your collarbones. Such a practice take time and patience, but the effect is worth the effort.
Knees, Chest, and Chin (Ashtanga Namaskara)
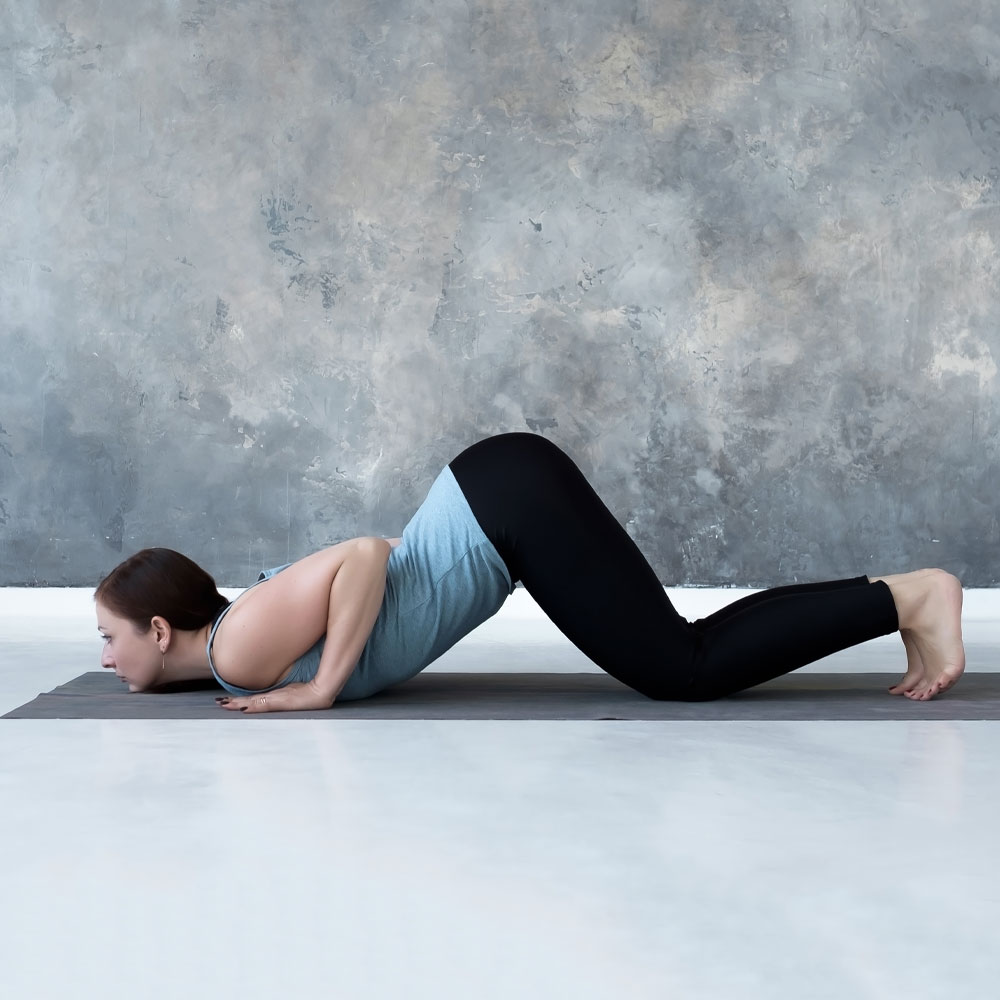
Ashtanga Namaskara may be a little rarer when compared to other poses, but it is nonetheless effective. The posture offers an excellent warm-up and can be used by all beginners.
- Start with a plank position.
- Lower your knees so that your toes are tucked under.
- Press your elbows to your body and lower both your chest and chin to the floor.
- Make sure that your shoulders hover over your hands.
- Keep the position for as long as you feel comfortable with it.
Seated Poses
Staff Pose (Dandasana)
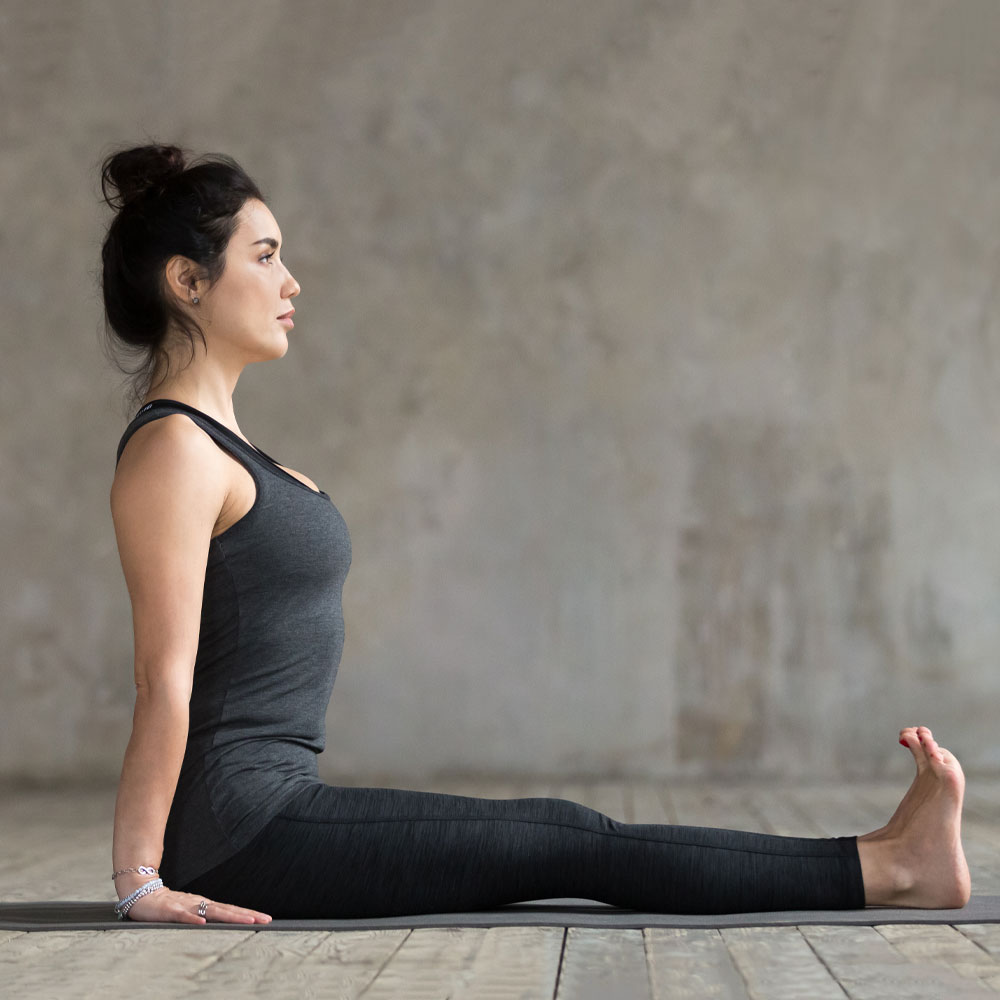
There is a circling opinion that all sitting yoga poses are incredibly simple, and the assumption is true to a point. In the case of Dandasana, you should do the following:
- Sit down on your mat and engage your leg muscles.
- Flex your feet.
- Try to lift your chest while relaxing the shoulders.
- You may bend your knees a little.
- Use a block if necessary.
Cobbler's Pose (Baddha Konasana)
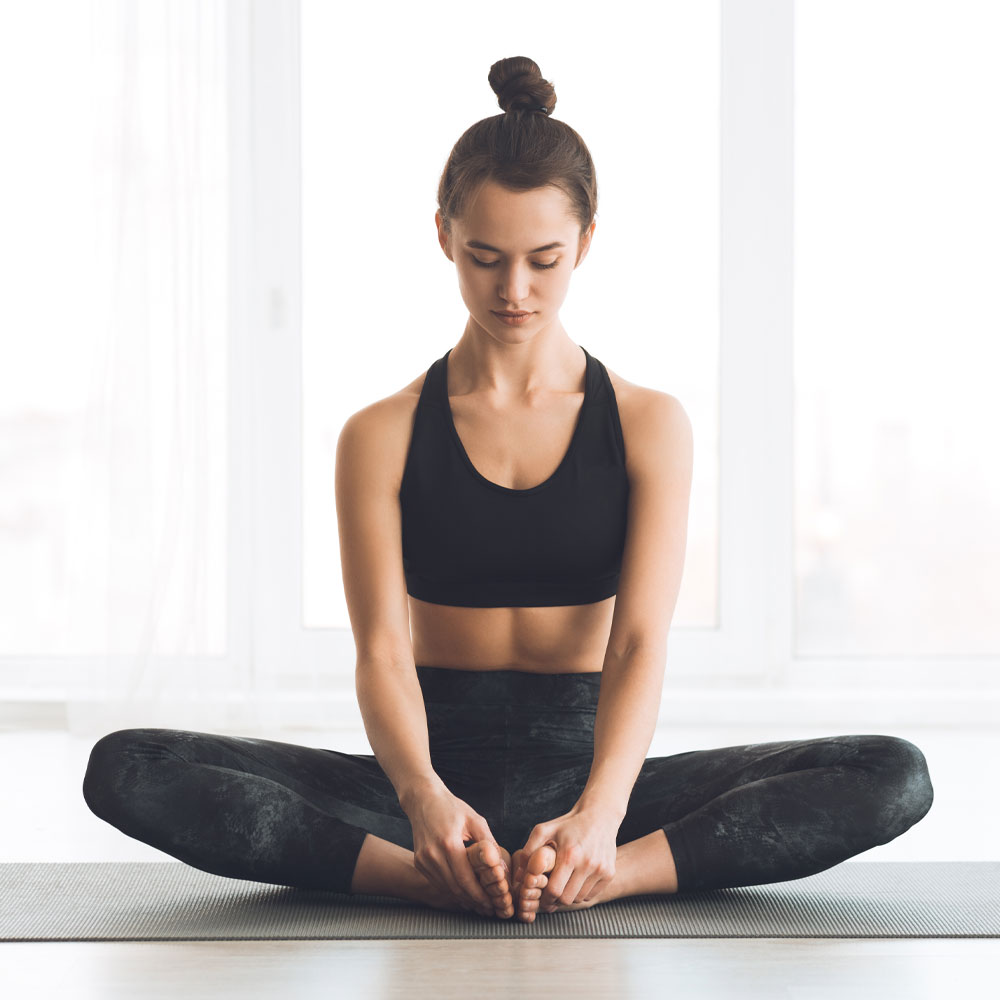
Baddha Konasana is designed to trigger all the muscles you may neglect during any other activity and everyday life. Despite its visible simplicity, some people find it challenging to assume the Cobbler's pose. Thus, it is advised to use some props to succeed with the posture. A blanket or a block will help you stretch the inner thighs better. You can put the supporting object under your butt or under your knees, depending on the part that causes the trouble.
Easy Pose (Sukhasana)
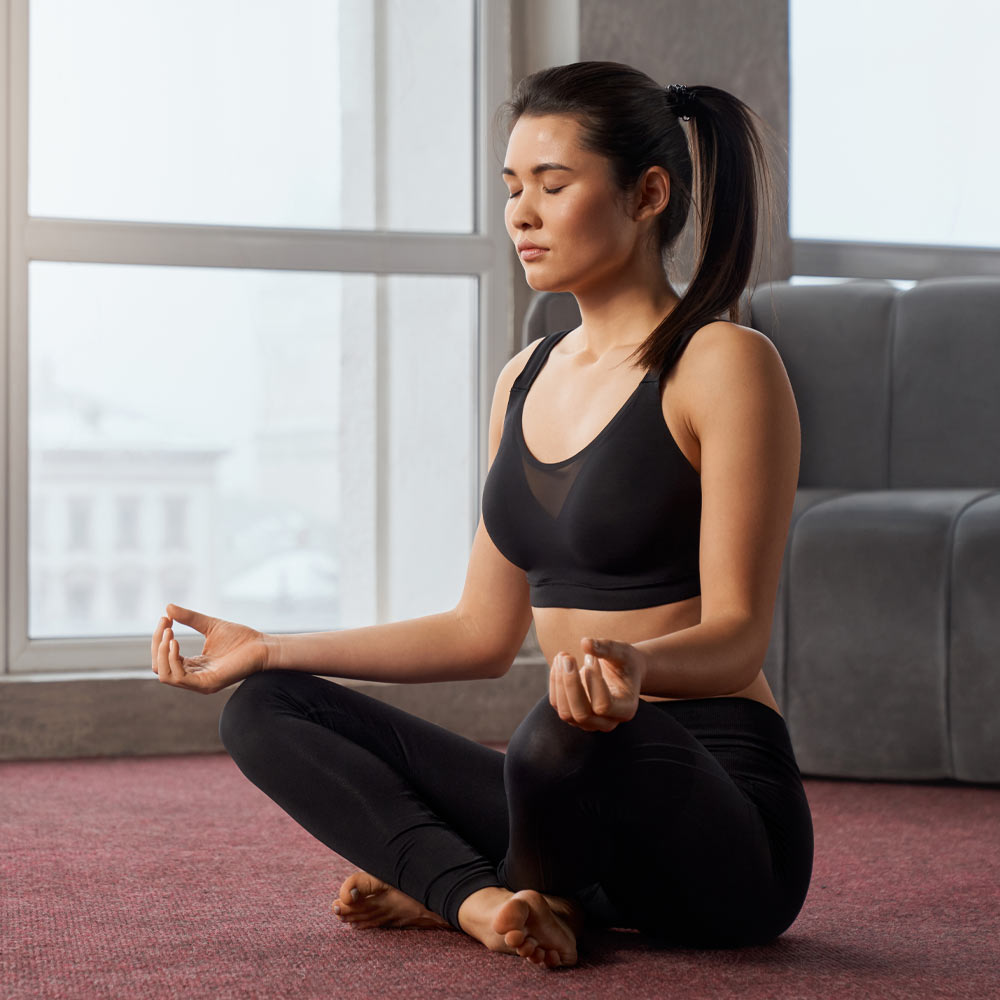
Whenever you think about yoga, you inevitably picture someone in the Sukhasana pose. The Easy pose requires you to sit down with your legs crossed and relax, breathing in and out deeply. In case the pose is too much for you at the moment, you can use a block as well.
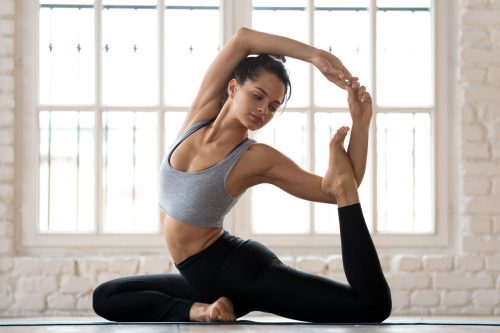
Half Lord of the Fishes Pose (Ardha Matsyendrasana)
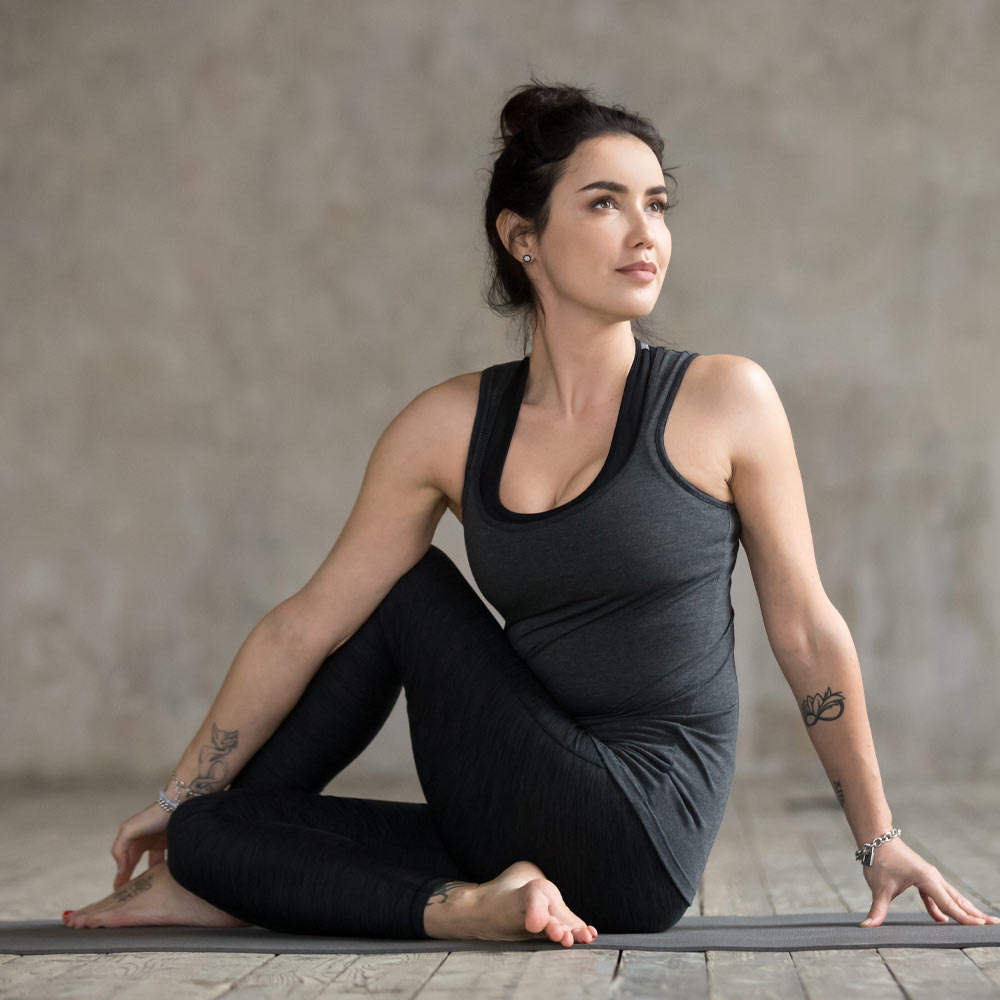
It is hard to imagine yoga without twists, and Ardha Matsyendrasana is one of the poses that enlists a bunch of those. The primary aim of the posture is to improve your mobility, but its positive effect on the digestive tracks can't be treated lightly.
- To assume the position, you have to sit on the floor.
- Bend one leg and place the other leg over it.
- Turn the torso facing the opposite direction of your bent knee.
- In case the initial position is too difficult to assume, you can stretch the lower leg and sit on the blanket to decrease the stress on your hips and spine.
Head to Knee Pose (Janu Sirsasana)
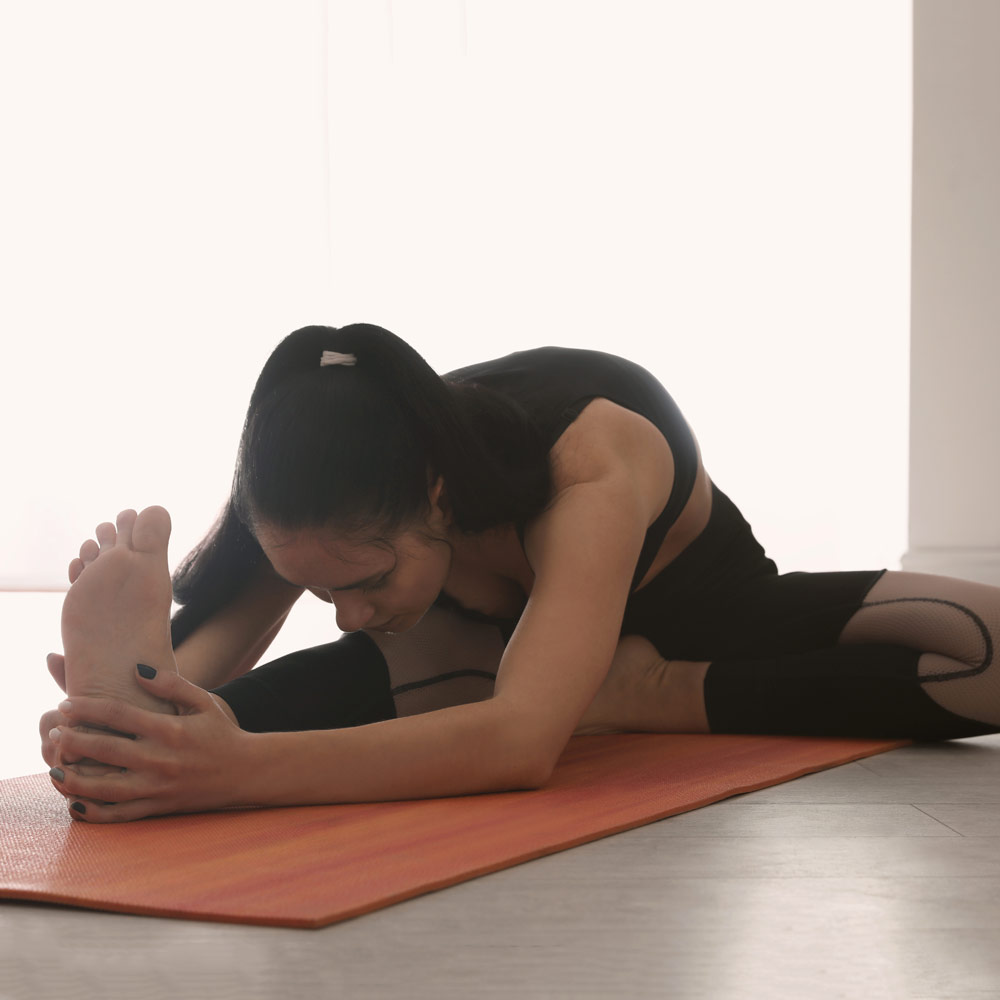
Janu Sirsasana is yet another advanced pose when it comes to seated yoga. To assume the correct position requires a fair share of flexibility, but you will arrive there as you keep practicing. The best way to master the pose is to stretch one leg at a time. Besides, you can use a foot strap to extend the reach. Lower your torso slowly without stressing your hamstrings too much.
Seated Forward Bend (Paschimottanasana)
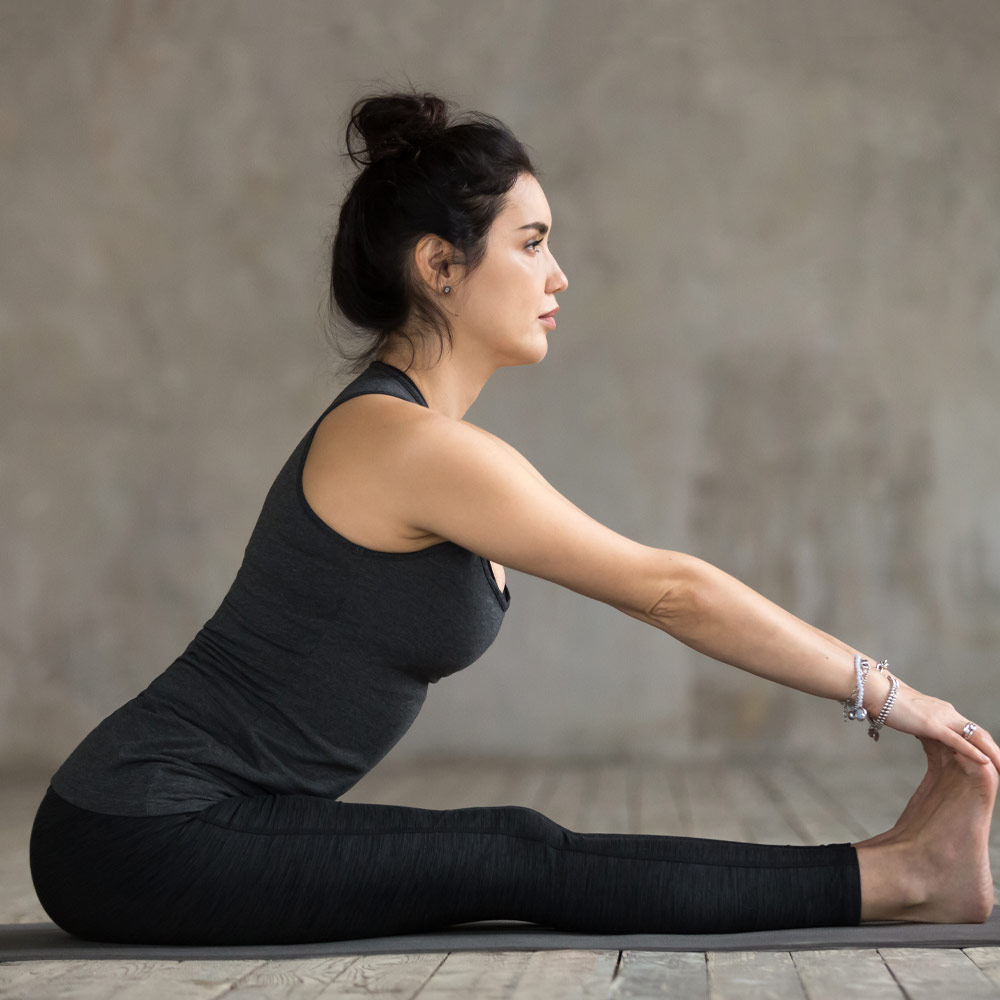
Paschimottanasana is one more exercise aimed at improving the flexibility of your legs and hamstrings. In case you don't know, tight hamstrings can lead to back pain, and stretching those is critical to avoid unpleasant outcome.
All it takes is to sit down on the mat with your legs stretched in front of you.
Try to reach your toes with your fingers keeping the back straight.
Try not to overstrain your muscles while assuming the pose.
Make sure you are bending from the hips, not the spine.
Seated Wide Angle Straddle (Upavistha Konasana)

Upavistha Konasana triggers even more muscles than the previous sitting poses. It is critical to understand that the position is not about bringing your body as close to the floor as possible. It is vital to keep a flat back, rotating the pelvis forward and flexing your legs. Once you manage to sync all three points, you will reap all the advantages that the pose offers. Use this guide to assume the position correctly:
- Sit down on your mat with your legs separated.
- Flex your feet.
- Bend forward, toward the center.
- Extend your spine as you inhale and go deeper as you exhale.
Supine Poses
Happy Baby Pose (Ananda Balasana)
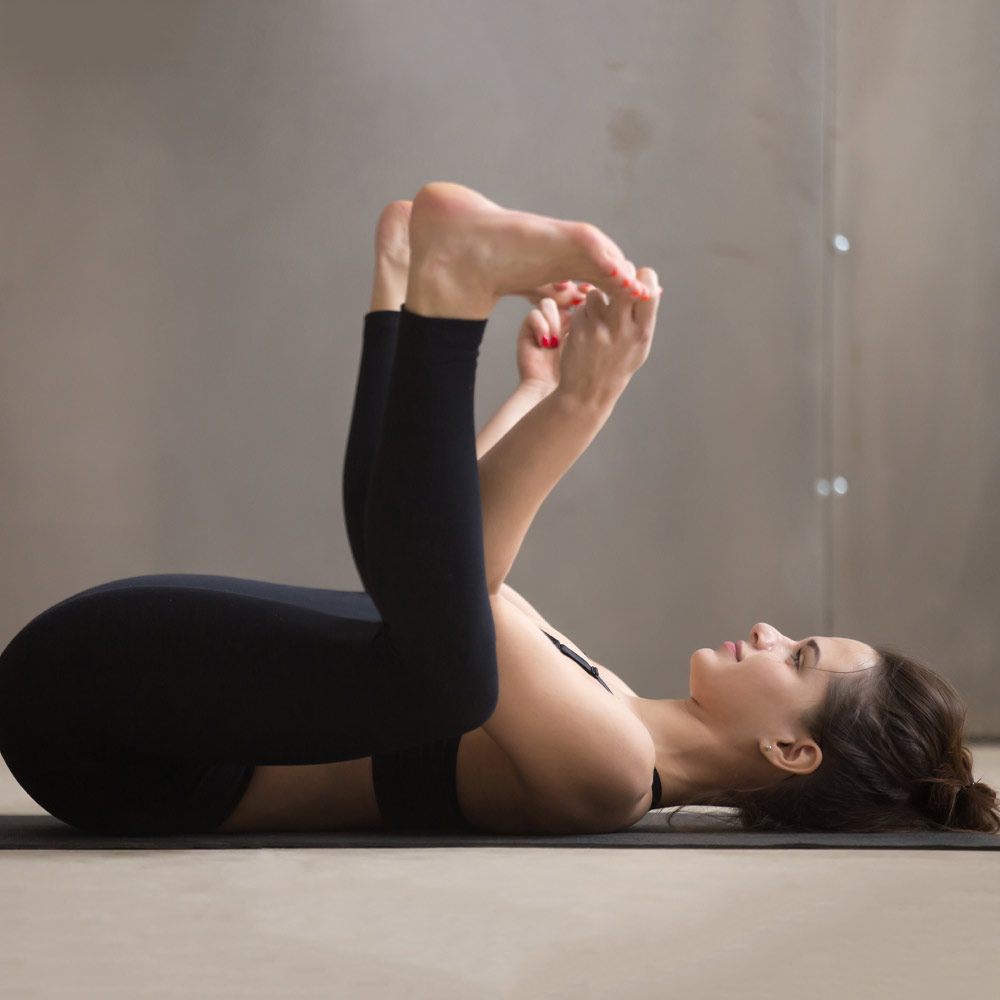
Some people claim Ananda Balasana belongs to sexy yoga poses, but we will leave it to you to decide. What we do know is that the Baby pose is among the best to complete your session with. Surely, the pose is incredibly simple at its core, but the effect it has on your body is supreme. The key point here is to put some pressure on your feet as you draw them nearer to your armpits.
Supine Spinal Twist (Supta Matsyendrasana)
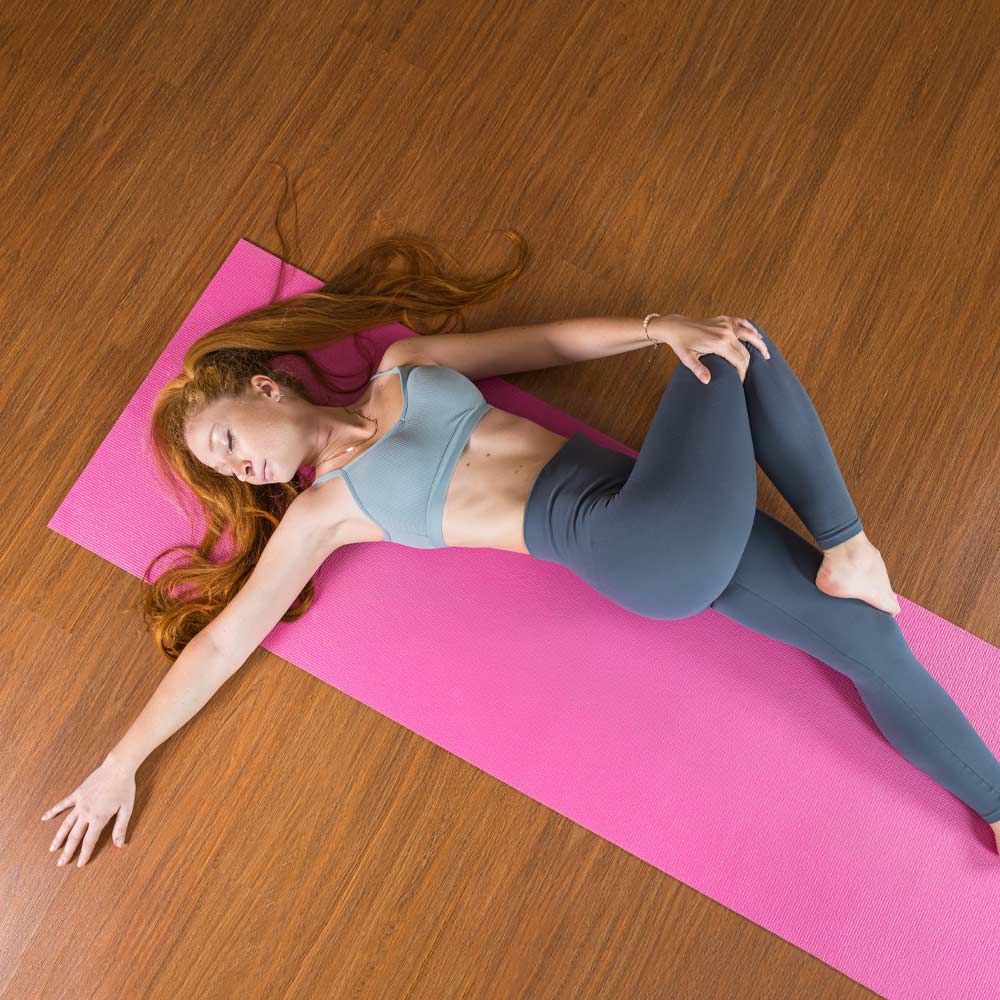
Supta Matsyendrasana is one of the best yoga poses when it comes to the absence of strict rules. You can use it at the end or the beginning of your session. Besides, you may position your legs the way you feel most comfortable. It is allowed to bend both knees, leave one leg stretched beneath, or keep the upper leg straight so that you can touch your foot with your hand. As long as you feel flexible enough to push a little further – you should do it.
Resting Poses
Child's Pose (Balasana)
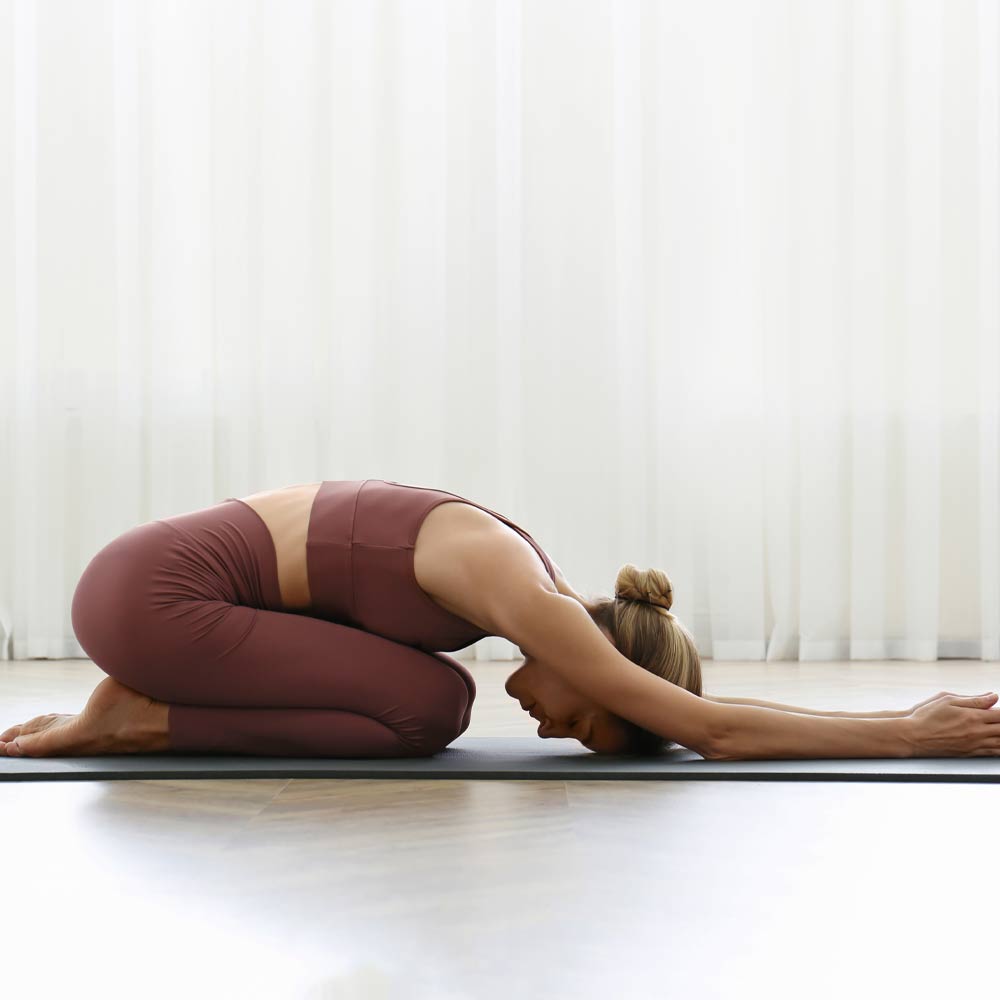
Many people describe Balasana as one of the simple yoga poses. Besides, it is the pose to refer to whenever you feel like you need a break during practice. Stretch on the floor with your knees beneath your chest and your arms stretched forward. You can stay in the position for as long as you need.
Corpse Pose (Savasana)
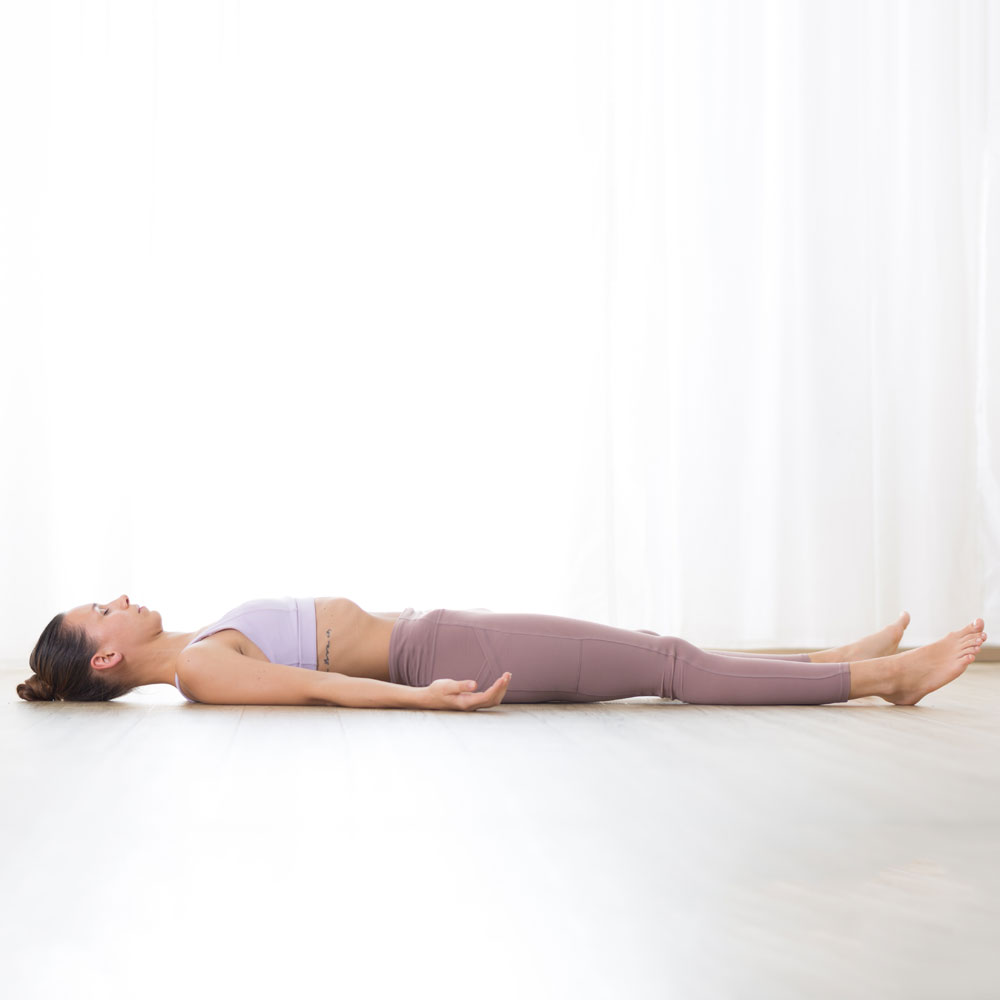
The Corpse pose bears one of the most repellent yoga poses names, but it is still quite helpful when transitioning from the practice into the routine. While there are no challenging twists involved, it may be quite challenging to lie still with your limbs relaxed. So it will take a bit to get used to the Savasana pose.
FAQ: Yoga Poses
Can yoga slim down legs?
Yoga can slim down your legs. Yoga has great benefits both for physical and mental health, in addition, contributes to creating lean and long muscles which slims down your thighs and hips. Moreover, this type of physical activity doesn’t create the appearance of bulky muscles unlike weight lifting, yoga gives you toned and flexible body.
Does yoga help cellulite?
Yoga creates lean and tones muscles; it helps reducing the appearance of cellulite by improving the lymph flow through fatty areas. Moreover, it removes toxins from the body. Yoga poses that include upside-down or inversion poses are especially effective for this purpose.
Was this article helpful?